Instant Gratification

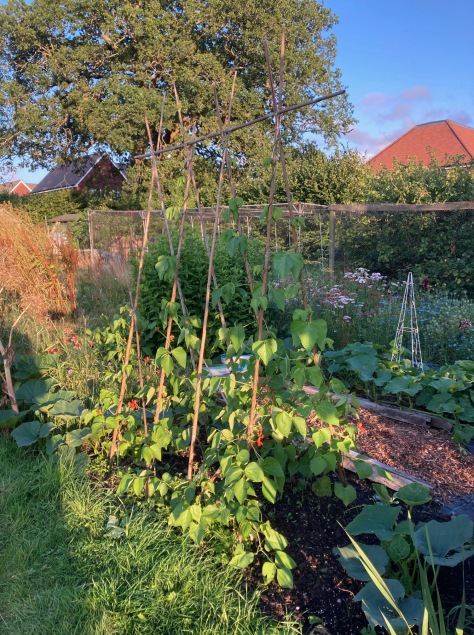
I’ve been meaning to write this post for some time now, but as usual life has got in the way and I haven’t managed to write any blog posts at all for quite some time. I have, however, still been cooking and gardening, of course (awful winter weather permitting), and I’m determined to share my experiences with the Instant Pot, especially as I’ve become more familiar with its uses.

Instant Pot with lid

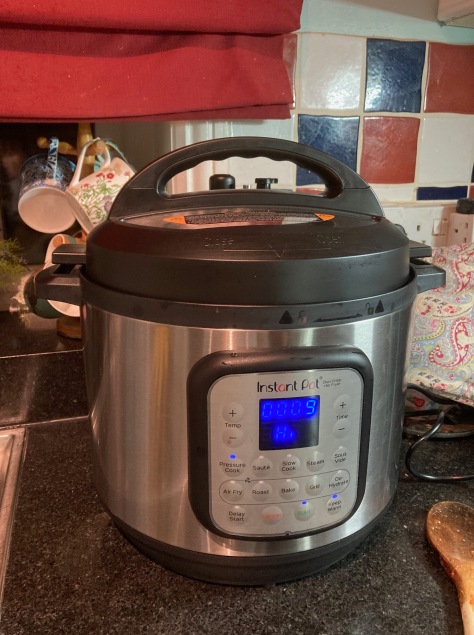
I treated myself to an Instant Pot electric pressure cooker a couple of years ago with my father’s usual Christmas money. My younger son and daughter-in-law have a Ninja Foodie in the US, so I’d had a little play with theirs and was impressed with the results – plus reduced washing-up for soups and casseroles as you sauté and cook in the same pot. I didn’t go for that model as I have a small kitchen and didn’t like the fact that the air fryer lid stays in situ all the time, taking up a lot of space on the work surface, whereas the Instant Pot has two interchangeable lids. You need space to store them, but at least the pot itself only takes up a similar amount of space to a standard slow cooker when in action.

I have to confess that I was quite scared of it at first; I’m always hopeless with new gadgets and memories of my mum’s hissing pressure cooker did nothing to reassure me. Once I plucked up courage to have a go (following the instructions meticulously), I realised that it’s actually simplicity itself: just press the appropriate buttons, make sure the lid’s on properly and Bob’s your uncle. There’s a tiny bit of hissing as it comes up to pressure, but that stops quickly as soon as it reaches pressure and then it sits there silently doing its stuff as you go about other things – no steam in the kitchen, no worries about gas flames going out if you pop out. Once it finishes, you can release the pressure manually, which does cause a noisy rush of steam, but I usually opt for natural release, which allows the contents of the pot to carry on cooking gently and keep warm in the process (plus no hissing!).

When I first experimented, I tended to look for specific Instant Pot recipes, such as this chilli con carne, but in actual fact you can use your own favourite recipe, just remember that the liquid won’t evaporate as much as it would in the oven or on the hob, and add less to start with. If you do end up with too much liquid at the end, it’s easy to just switch to sauté and reduce as much as you need. In the Instant Pot, the actual cooking time for a chilli or casserole can be anything from 10-30 minutes – significantly less than the three hours you’d expect in the oven, or 8-10 hours in a slow cooker. I’ve made my standard lentil bolognese recipe with great success, and my beef & Guinness casserole worked a treat – so tender. Soups are equally easy and of course you can use a stick blender to purée them directly in the Instant Pot, further cutting down on washing-up.

Instant Pot

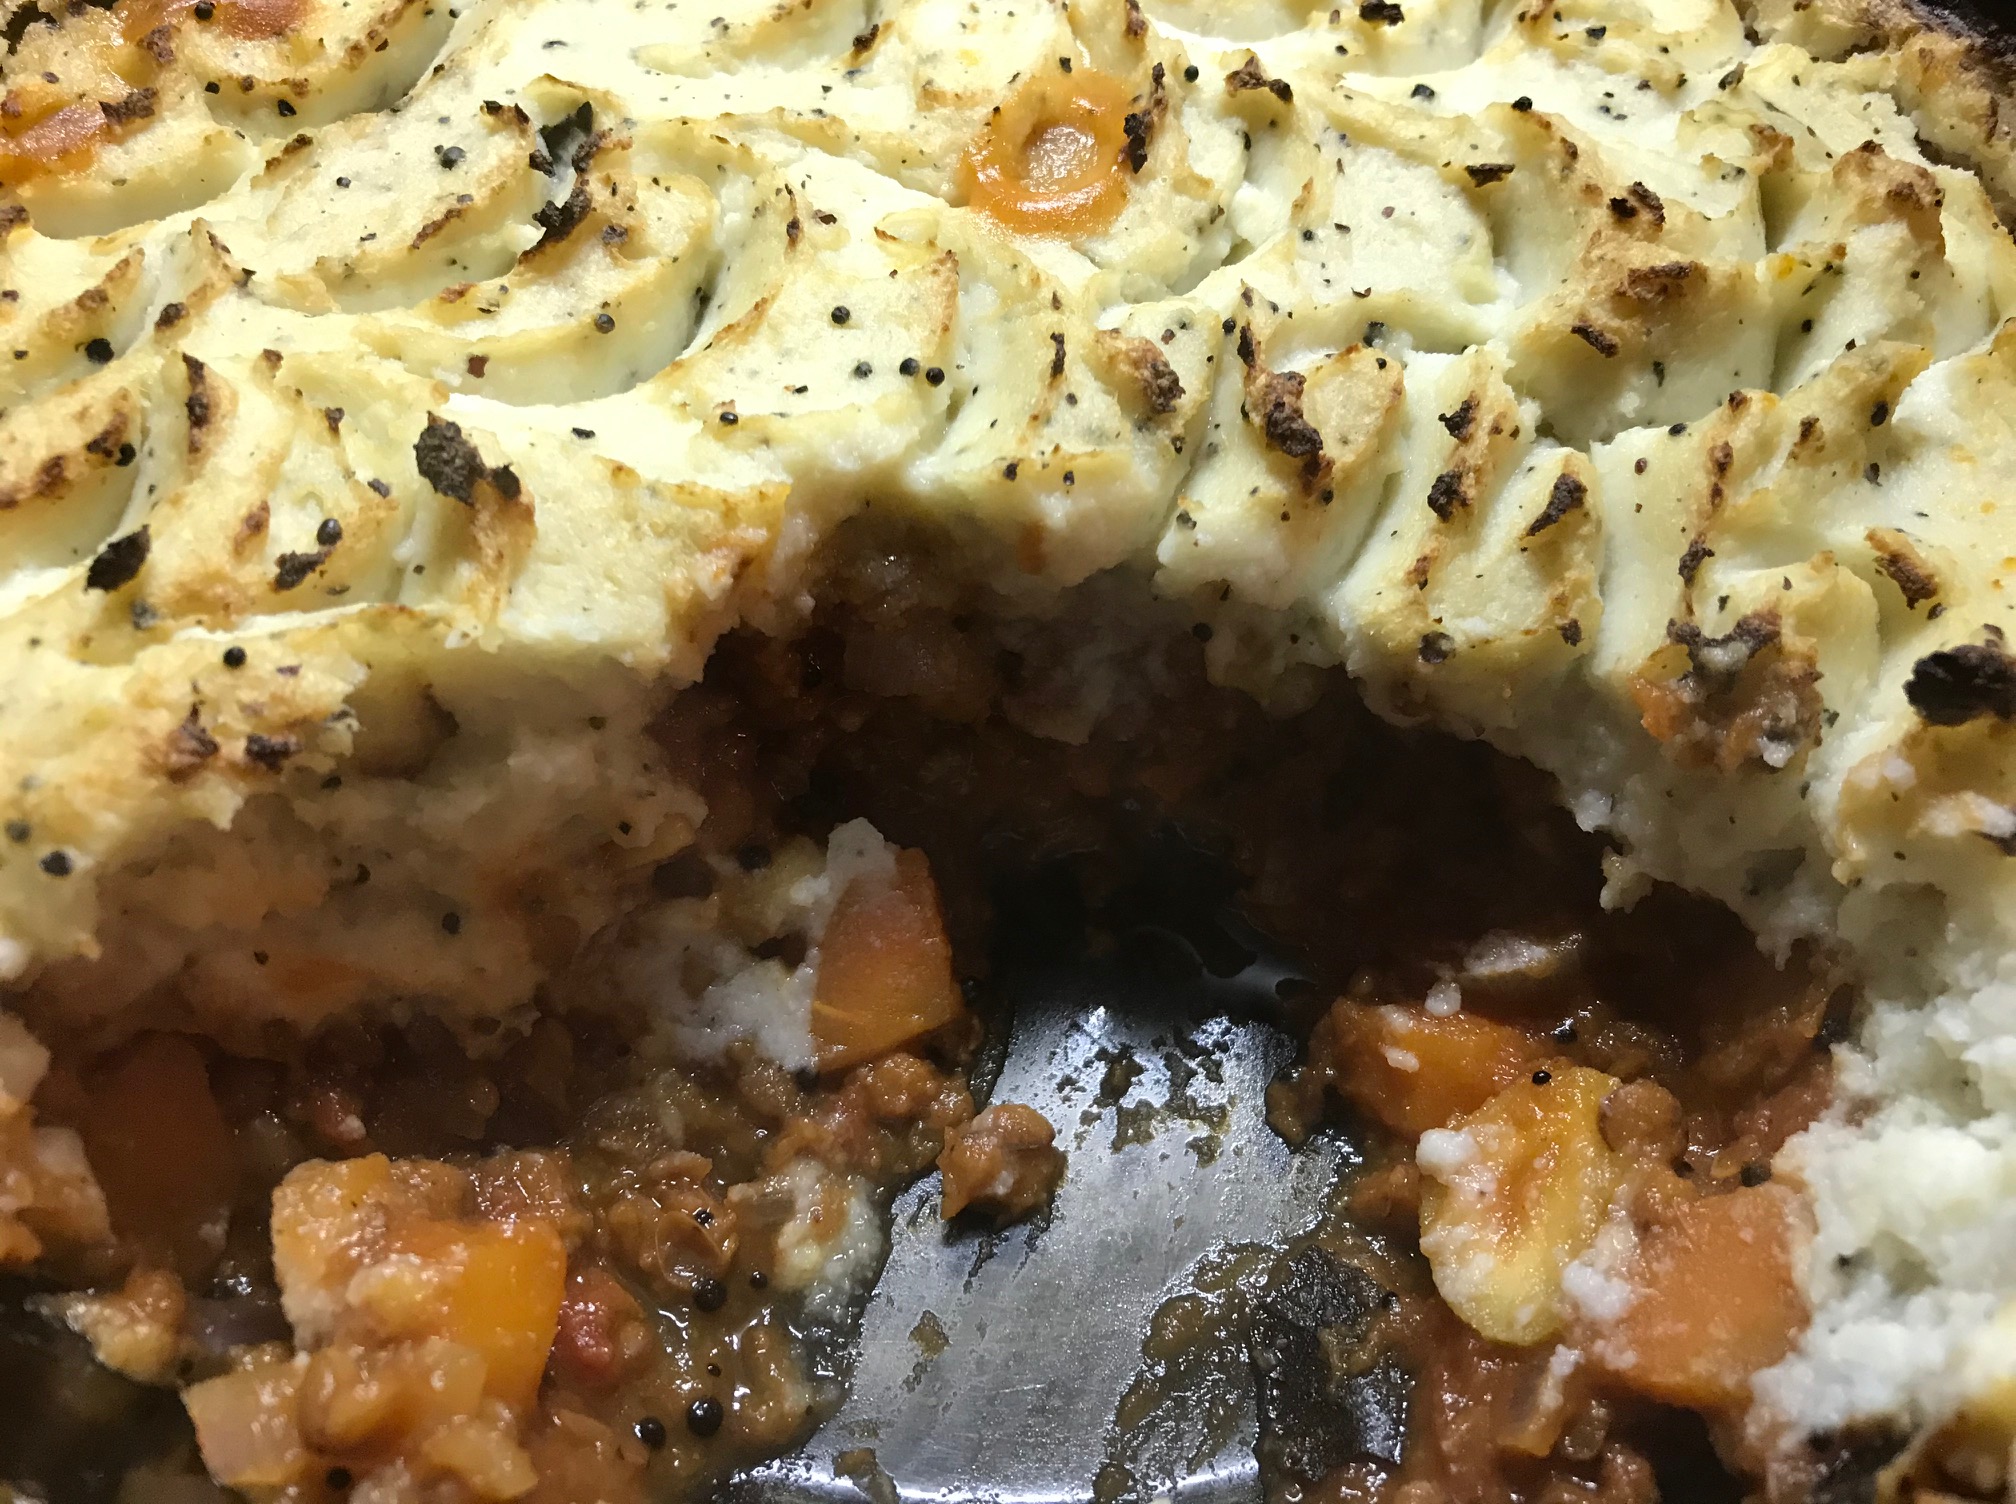
What I’ve recently come to appreciate, though, is the wonderful timesavers that are really game-changing. Cooking pulses, for example: I still like to soak my own beans for chillis or bean casseroles, as I like the choice and think you get a better texture (plus it’s usually cheaper). But, even after you’ve soaked them overnight (I often start with boiling water to speed up the process), they can often take between 45 minutes to several hours to cook, depending on the variety. Dried chickpeas are particularly time-consuming. In the Instant Pot, however, soaked beans take no more than 10-30 minutes. You can even cook them without soaking first, although I must admit I haven’t tried that yet. Aduki beans for my aduki bean & leek casserole were ready in 10 minutes plus natural release, whereas butter and haricot beans for my bean chowder needed just 20 minutes plus natural release. And while dried beans often need variable amounts of time to cook using the traditional stovetop method, depending on how old they are or how long you’ve had them in the cupboard, these were all perfectly soft – win, win. This recipe for pork and butterbean pie is a bit like a cottage pie but with mashed butterbeans instead of potato for the topping.

Pork and Butterbean Bake – serves 6-8

Pork and butterbean bake

350g dried butterbeans
5 or 6 fresh or dried bay leaves
4 cloves garlic
2 sprigs fresh rosemary, finely chopped, woody bits discarded
4 tbsp olive oil
1kg minced pork
2 leeks, chopped (optional)
1 red pepper, chopped (optional)
2 rounded tsp ground coriander
2 heaped tbsp tomato purée
1 large can chopped tomatoes
75g butter
about 2 tbsp breadcrumbs (white or brown)
1 tbsp grated Parmesan cheese
Salt and pepper to season

Put the butterbeans in a large pan and pour over boiling water, then leave to soak overnight. Drain and either cook in the same pan with fresh water and the bay leaves, bringing to the boil and simmering for 1 to 1.5 hours until very soft OR transfer to the Instant Pot, cover with a litre of water, and pressure cook on high for 30 minutes, allowing to natural release at the end. When cooked, drain off the cooking liquid (you can keep this for a beany stock for vegetable soup), discard the bay leaves, then place the beans in a large food processor with the butter and half the chopped garlic. Blend until you have a smooth purée, then set to one side. This works best if you do it while still warm.

For the base, heat 2 tbsp olive oil in a large ovenproof pan, then add the minced pork and stir until lightly browned. Stir in the chopped leeks, remaining chopped garlic cloves and the chopped red pepper (if using). Cook until starting to soften, then add the ground coriander, chopped rosemary and tomato purée. Cook for a few more minutes, then stir in the can of tomatoes and allow to simmer gently for 15 minutes. Season to taste, remove from the heat and top with the butterbean purée. You can, of course, transfer to an ovenproof dish at this stage if you prefer, but I tend to use my Le Creuset pan and place it straight in the oven.

Finally, put the breadcrumbs in a small bowl, add the Parmesan and the remaining 2 tbsp olive oil, then mix. Scatter on top of the butterbean bake and cook at 160°C fan/350°F/Gas 4 for 45-60 minutes until cooked through and the topping is golden brown. Serve with a green salad or leafy vegetables like broccoli or kale.

Marina di Chioggia squash

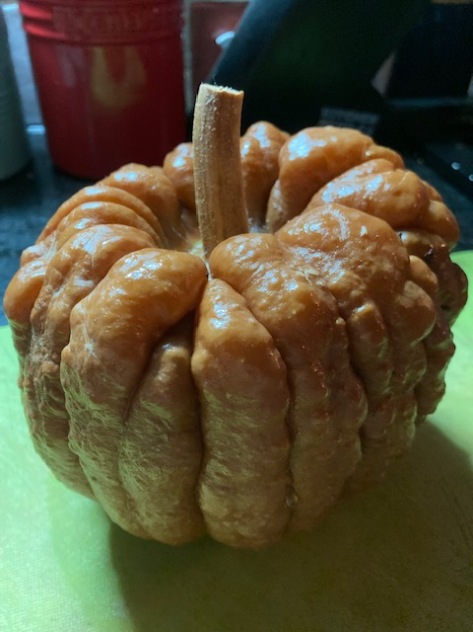
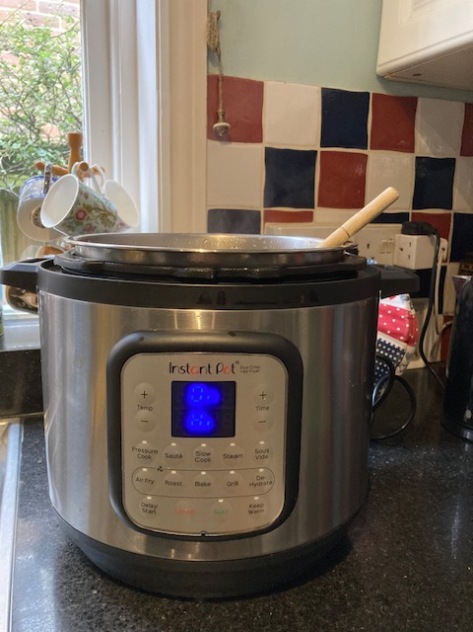
Another great use for the Instant Pot is to soften squashes prior to preparation. Last year I grew the Marina di Chioggia variety, which is delicious, beautiful, but very deeply ribbed, so a nightmare to peel. After commenting about this on the Foodie Translators group on Facebook, a colleague recommended cooking the whole squash in the Instant Pot on high pressure for 8 minutes. You place a trivet at the bottom (one comes with the machine), add about 400ml water and place the squash on top, then put the lid on. You can either release the pressure or allow to natural release, but then leave until cool enough to handle, and hey presto, the skin comes off like a dream. You can then remove the seeds and fibrous centre and cook the rest as you normally would, whether roasting or frying for a pumpkin, leek & apple soup or adding to a squash & leek risotto. Such a game changer. As a bonus, Leo the labrador will eat the skin and seeds with his raw food, whereas he’d previously turned his nose up at the uncooked squash.

Squash, leek and apple soup
Squash, leek & apple soup

Then there’s stock, of course, I used to use my slow cooker to make chicken stock with a chicken carcass after roasting, cooking it long and slow overnight. That’s still an option, but the Instant Pot can make stock in an hour, from either a leftover roast chicken carcass, or from uncooked bones. Just add onion, carrots and celery, bay leaves, leftover vegetable cooking liquid if you have it, or fresh water and cook on high for an hour. If you increase the time to 3-4 hours, you end up with a deeply flavoured and unctuous bone broth – give it a go! I tried this with a beef shin bone from my farm shop earlier this year and it was very good indeed, the perfect base for a Gulaschsuppe or beef risotto.

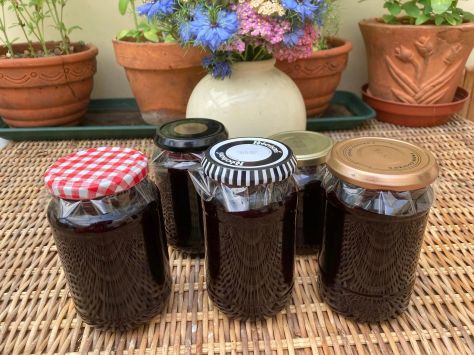
Finally, I used the Instant Pot to cook tangerines earlier this year for marmalade and for a take on Nigella’s clementine cake, which uses the whole fruit, skin, pith and all. I’d bought some lovely tangerines on offer and had a yen to make marmalade, for which I found this lovely recipe online: https://www.lanascooking.com/instant-pot-spiced-orange-marmalade/ . The original recipe only used 450g oranges, but I had a lot of tangerines, so I decided to double the quantity of fruit and use half for my tangerine cake. Cooking the fruit for standard marmalade or the cake usually takes a good hour and a half at least, so this was a huge time saving. I didn’t add any sugar to the Instant Pot as I was doing two recipes, but I did add a cinnamon stick and the cloves as I thought they would be nice flavours in both. Star anise or cardamom would have been good too. I used a litre of water for the double quantity of fruit, but the quantities in each recipe are right for each one in case you cook them in isolation.

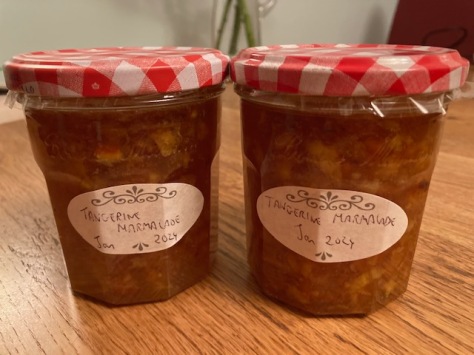
Tangerine Marmalade – makes two standard pound jars

Tangerine marmalade

450g tangerines, scrubbed
560ml water
600g granulated sugar
juice of half a lemon
1 cinnamon stick
3 whole cloves (or you could use star anise or 5-6 cardamom pods)

Put the tangerines in the Instant Pot with 560ml cold water, add the spices and cook on high pressure for around 15 minutes. Allow the pressure to release naturally, then open the lid and leave until cool enough to handle. (If cooking in a normal pan, just add plenty of water and cook for 1.5-2 hours until very soft.) Discard the spices but reserve the cooking liquid.

At this stage, halve the fruit and try and remove all the pips, then thinly slice the rest of the fruit, peel, pith and all. At this point you can return the fruit to the Instant Pot to continue making the marmalade on the sauté setting, or you can use a normal pan. This isn’t a huge quantity so a large pan will do rather than a preserving pan, but if you double the quantities, I’d use a preserving pan.

In the pot/pan, place the fruit, 560ml cooking liquid, the juice of half a lemon and bring back to the boil before stirring in 600g granulated sugar. Stir until dissolved then continue to boil, stirring regularly until setting point is reached. This only took 10-15 minutes for me, but can vary.

I find the best test is to hold your wooden spoon over the pan and when the drips run together to form a bigger drip that breaks off sharply, the jam will be done. Otherwise, have a saucer in the freezer and place a little of the jam on the saucer, cool slightly, then push with your finger: the surface should wrinkle. You will need to take the marmalade off the heat while you do this test to stop it overcooking.

When set, allow to cool for about 10 minutes to stop the chopped rind floating to the top of the jars, then pour into prepared jars (washed and sterilised in the oven on a low heat), cover with waxed circles and lids, then label when cool.

I didn’t find it necessary to refrigerate the marmalade either before or after opening, as the original recipe suggests, but if you live in a warmer climate than the UK, you may prefer to store in the fridge! There’s plenty of sugar in the recipe to preserve it to my mind.

This would also work well with blood oranges.

The tangerine cake recipe uses the other half of the tangerines if you’ve decided to double up as I did, but I’ll repeat the instructions below just in case. It’s dairy and gluten-free so a good option for family and friends with food intolerances. Both my daughter-in-law and her mum are gluten-intolerant and a good friend has recently been diagnosed as coeliac at 63, so I’ve been doing lots of experimenting recently. Plus my other daughter-in-law is avoiding dairy as her new baby is intolerant of something in her breast milk and dairy protein is the likely culprit.

All-in-one Tangerine Cake – serves 10-12

Tangerine cake slice

approx. 400g tangerines (about 4)
6 large eggs
225g caster sugar
250g ground almonds
1 cinnamon stick (or cardamom or star anise)
1 tsp baking powder (use gluten-free if necessary)

Put the tangerines in the Instant Pot with 560ml cold water, add the spices and cook on high pressure for around 15 minutes. Allow the pressure to release naturally, then open the lid and leave until cool enough to handle. (If cooking in a normal pan, just add plenty of water and cook for 1.5-2 hours until very soft.) Discard the spices and the cooking liquid.

Preheat the oven to gas 4/160°C fan/350ºF and grease and base-line a 20cm springform cake tin.

Once the tangerines are cool enough to handle, halve the fruit and try and remove all the pips, then place everything else, skins, pith, pulp and all, in a food processor and whizz until thoroughly blended. Add all the other ingredients to the food processor and mix thoroughly. Or you can beat the eggs by hand, adding the sugar, almonds and baking powder, mixing well, then finally adding the pulped oranges.

Pour the mixture into the prepared tin and bake for an hour or until a skewer comes out clean. You may need to cover with foil after 40 minutes or so if it’s getting too brown: do check. Leave to cool in the tin, then serve with crème fraiche or whipped cream – so good.

And there you have it – just a few of the myriad uses of the Instant Pot. Mine has many more settings besides, including air fryer, sous-vide and dehydrate modes, but I’ve yet to experiment with those. I’ll be sure to report back when I do!

Hellebores March 2024

Glut Central

The allotment seems to have gone mad recently, probably helped by liberal helpings of rain. I knew creating new raised beds for drought conditions would be bound to have this effect! Not ideal for picking flowers, but extremely good growing conditions for weeds and (fortunately) for summer fruit and veg too. The courgettes are growing fast and furious, as are the beans, French and runner, although they were only sown in early June so won’t be ready for harvest any time soon.

Runner beans

I thought my root crops hadn’t done well this year, with only seven parsnip seeds germinating (despite covering the earth with fleece before sowing in April) and gaps in my rows of carrots and beetroot. Take your eye off the ball, however, and things can change virtually overnight! When I went up to the plot one evening this week to weed the root bed, I was amazed to find some huge cylindrical beetroot and plenty more coming. The Snowball turnips were also looking promising, so I thinned them as I weeded. The carrots, under their protective Enviromesh tunnel to foil the dreaded root fly, are looking good too. I sowed more carrot and beetroot seeds in the gaps in the parsnip rows for an autumn crop and went home feeling much better – armed with a basket of beets!
Beetroot raw

Deciding what to do with these beauties was no contest: I love beetroot roasted and served with cheese and fresh bread, as a side, or taking centre stage in a Puy lentil salad. Just wash, remove the leaves (reserving for later use – they’re equally delicious as long as they’re still green and fresh) and wrap individually in foil, then bake at 180-200°C fan (Gas 5-6) for 1-2 hours, depending on size. They should feel just squishy to the touch when ready. I leave to cool in the oven, then the skin should just rub off when cold, and you can slice them, sprinkling with balsamic vinegar, and chill in the fridge until ready to serve or use in another recipe. My usual beetroot & lentil salad uses feta, but I didn’t have any on this occasion; griddled halloumi makes a pleasant change.

It always seems a shame to throw away the leaves and they taste similar to spinach or chard, so absolutely no reason not to cook them too. You can eat the leaves of beetroot thinnings in salads, but the bigger ones tend to need cooking. I stir-fried my first batch and mixed them in with the lentil salad but transformed the next lot into a delectable beetroot leaf, onion & ham tart, inspired originally by Jamie Oliver’s Italian ham & spinach tart in his ‘Jamie at Home’. Tweaked, of course – I was only cooking for one (with plenty of leftovers for lunch the next few days), so used a smaller circular tart tin and substituted beetroot leaves for the spinach he suggests. I also had two egg yolks left over from making a jostaberry mousse earlier in the week (see below!), so used those with one whole egg. You can omit the ham if you prefer, and make it vegetarian using toasted pine nuts, mushrooms or even capers instead.

Beetroot Leaf, Onion & Ham Tart – serves 3-4

Beet leaf, ham and onion tart

20cm shortcrust pastry case, baked blind
Large bunch fresh beetroot leaves (or you can use 150-200g spinach or chard if you prefer, thick stalks removed)
2 red onions, finely sliced
1 clove garlic, chopped
1tsp sugar
Fresh thyme leaves (several sprigs, leaves stripped from the wiry stalks)
Olive oil
Dash of balsamic vinegar
50g Parma ham (or bacon/any other form of ham you happen to have!)
1 egg plus 2 egg yolks (or use 2 eggs)
200ml crème fraîche (or double cream, or blend of both)
75g freshly grated Parmesan (or Grana Padano, which is cheaper but still pretty tasty)
Salt and black pepper to season

Cook the sliced onions and garlic in olive oil until starting to soften (15 minutes or so), then add the beet leaves and thyme, cooking over a low heat until well wilted down – another 5-10 minutes. Add the ham, then 1 tsp sugar and a dash of balsamic vinegar, then leave to stand until you’ve prepared the egg custard mix.

Meanwhile, mix the egg and yolks in a large bowl, add the crème fraîche and/or cream, season with salt and pepper, then stir in one generous tbsp of grated Parmesan. Tip in the contents of the beet leaf pan and mix thoroughly, then transfer to the cooked pastry case, smoothing the filling out to cover evenly. Sprinkle with the remaining Parmesan and bake for 20-25 mins at 180°C fan (Gas 5). Serve warm with salad and a side of roasted beetroot if you have them. Also delicious eaten cold or warmed through the following day for lunch.

Bet leaf tart served

Air fryers are brilliant for heating things like tarts, incidentally. You can use the microwave, of course, but the pastry base has a tendency to go soggy. If you pre-heat the air fryer as usual, it only takes a few minutes to warm a slice of tart – much cheaper than turning the whole oven on and the base remains crispy 😊.

Another of this week’s gluts has been jostaberries. These aren’t actually mine, but both my lovely allotment neighbour and friends with a smallholding have a jostaberry bush, so I invariably get invited to help myself at this time of year. The bushes grow to huge proportions and produce corresponding amounts of fruit. As a cross between blackcurrants and gooseberries, the fruit is quite tart, but lends itself beautifully to jam and compotes, and also works well in fruit fools. Just substitute them for gooseberries or blackcurrants in any fool recipe. As a bonus, you don’t need to top and tail them as you’ll be sieving the compote anyway to make the smooth purée.

Jostaberry bush

This week, when I’ve been quiet on the work front during the usual July lull when all my clients seem to be on holiday, I’ve made jostaberry jam, using my usual recipe. I’d read a great tip online to ease the arduous task of topping and tailing the berries, which are squishy like blackcurrants but have obtrusive tails like gooseberries. By freezing the berries first, the tails just brush off – genius! It still takes a while, as 1.5 kg of jostaberries is a lot of individual berries, but it’s far less messy. And doing them watching a work webinar made not only made the time fly, it also ticked the CPD box. Win-win!

jostaberry jam

I also made a jostaberry mousse (finally getting on to those spare egg whites!) as a change from fool. It’s been ages since I made a mousse, but they’re not really any trickier than fools and have a delightfully cloud-like texture. This is what I did:

Jostaberry Mousse – serves 4-6

Jostaberry mousse

450g jostaberries
100g caster sugar
3 tbsp crème de cassis (optional)
3 sheets of leaf gelatine
150ml double cream
2 egg whites

Put the jostaberries with the sugar and cassis (or a dash of water if not using) in a pan and simmer for 10-15 minutes until soft.

Meanwhile, soak the gelatine in cold water in a small bowl until it softens.

When the berries are cooked, stir in the softened gelatine, then strain into a bowl. Leave to cool, watching carefully as you need to catch it just before it sets. You can refrigerate to speed the process up but do keep checking! I find it usually takes an hour or so and stay in the kitchen doing other tasks so I’m on hand at the critical moment.

Just as it starts to thicken, whip the double cream until the soft swirl stage, then fold gently into the setting mousse. Whisk the egg whites until they form soft peaks, then fold them carefully into the mousse mix until there are no specks of egg white or cream remaining. Pour the mousse into 4-6 glass dishes and chill for a couple of hours before serving.

Flowers

Raising my Game – coming to terms with loss and moving on in the garden

Dad and I at Wisley Sept 2020

It’s been almost a year since I last wrote on these pages – life has a horrible habit of getting in the way and the past 12 months have been rather a rollercoaster, to say the least. Anyone who reads my other blog may know that my father passed away after a long struggle with dementia in January, so my time was taken up with increasing care responsibilities and hospital visits until then and then coming to terms with grief and sorting out the estate ever since. It has felt like a long haul, but things are slowly returning to normal and finally I feel I have time to start writing for myself again.

Rather fittingly, gardening has provided huge solace in the past few months, just as it did when Mum passed away 14 months earlier. Revisiting old haunts like RHS Wisley or National Trust properties such as Wakehurst Place and Standen or Sheffield Park has been hugely cathartic, tied up as they are with memories of visiting them over the years with my parents and when my boys were small.

Wakehurst Place Jan 2023
Wakehurst Place January 2023

I had to drive to Leatherhead to register my father’s death in late January (who knew that you had to register a death in the county of death? Surrey in Dad’s case as he was in Redhill Hospital, not Sussex where they lived, further adding to relatives’ burden at such a difficult time). I decided to go on to Wisley, 15 minutes further down the road, a garden Mum and Dad adored, so a fitting place to visit on that of all days. And always lovely to see the bare bones of a garden at that time of year. The hamamelis were out in full bloom and smelled heavenly; the long-tailed tits clearly thought so too! I even bought a couple of small trees from Wisley’s well-stocked garden centre with a garden voucher my sister had given me for Christmas: Amelanchier Ballerina and Cercis canadensis Merlot – my father would have approved!

Wisley Jan 2023
RHS Wisley January 2023

Tending my own garden is another way of communing with my parents, strange though that may seem. As I’m sure I’ve said before, that sense of mindfulness you get when gardening is just what you need at times of sorrow, especially when gardening was a joy I shared with my parents – and one they’d probably inspired in the first place, as I recall in my post after Mum’s death in 2021. So many of the plants I have in my garden were cuttings from their gardens or gifts from them; Dad could never resist buying plants when we visited gardens or garden centres and many of mine were ones he insisted on buying for me.

Back on a rare sunny day in February, it was a delight to see snowdrop Sam Arnott out in force, heralding the arrival of spring. It brought back memories of a bitterly cold visit to Hadlow College’s snowdrop day some years earlier, when Dad had treated me to a pot of those very same bulbs, now divided many times and spread around my garden (and back to theirs!). Dad’s clivias in my conservatory (unheated this year due to energy costs!) had not one but three flower spikes this spring – a sign of Dad working his magic from beyond the grave perhaps? And my conservatory also plays host to two beautiful Bird of Paradise plants (Strelitzia) that Dad originally grew from seed from a holiday in Tenerife in 1988! They have been divided many times over the years and mine are due another division this year as the roots are threatening to break the pot – time to get the saw out, I think. I still have the original label with Dad’s handwritten notes about when it was split/repotted, although sadly I’ve neglected to update it in more recent times. So many happy memories…

Dad also helped with many garden projects over the years, both in my marital homes, when he got stuck in physically, clearing beds and hacking down rhododendron ponticum in our big woodland garden in Scotland, and then in the 2-acre garden we moved to in Sussex 20 years ago, before my then husband left just three months later. I was so grateful for my parents’ support and gardening help at that time, especially in a garden of that size! They were in their 70s by then but loved working in the garden with me – all that therapeutic chopping and hacking!

When I got divorced and downsized to a smaller house and garden two years down the line, they were always there for me. Dad in particular was hugely helpful doing a lot of the more physical stuff. I’m not afraid to get my hands dirty in the garden, but DIY is not one of my fortes and Dad, who originally trained as a joiner before his national service, put up a greenhouse (in the larger marital home – I only wish I had room for one now!) and a shed at the allotment, installed water butts, trellising and generally did all the things I couldn’t. He was such a perfectionist, but that became a problem in the latter years, when he became increasingly frustrated with his growing immobility and inability to do things the way he would have liked. He still enjoyed feeling useful though, so I tried to save little jobs for him that he could do sitting down – although he frequently forgot himself in his enthusiasm to help and we had to make sure we kept a close eye on him in case he fell!

In late autumn last year, before Dad passed away, I’d been taking stock and decided I needed to address the problem of the left side of my front garden, which had been badly affected by the drought conditions last summer. Despite being on the north side of my house, this area gets a lot of sun in summer and the problem is exacerbated by the fact that the site slopes, with next-door’s garden on a lower level. My neighbours also have a beautiful, mature cherry tree that sends out root suckers, as cherries are wont to do, and takes up a lot of water, as does my apple tree, on my side of the boundary fence. In a normal year, this wouldn’t be a problem, but the trend towards global warming has meant that the shrubs in the existing bed were struggling to cope and frazzled to a crisp last summer, with temperatures well in the 30s. That bed had also become infested with creeping potentilla and was a nightmare to weed.

I’d had a couple of quotes from landscapers last November to make two large raised beds and replace the scorched lawn with gravel, with the aim of creating a more Mediterranean planting vibe, with plants that can withstand drought. I’d duly chosen the one I preferred, with the arrangement that they’d get in touch when they had availability this spring. Sure enough, they contacted me just before Easter to say they could come in mid-April – what a transformation!

They did a great job, very efficiently, over two days, removing the weeds and what remained of the lawn, lining the whole area with weedproof membrane and filling the new, super sturdy timber beds with good quality topsoil, plus edging the existing apple tree bed with old bricks to finish it off. In the messy middle stages, I did start to wonder what I’d done, but once the gravel and soil went in, I was thrilled with the results!

Unfortunately, I then had to wait a while before I could plant them up – firstly, to let the soil settle, and then because I’d ordered two new roses by mail order. Once they arrived, the growers’ instructions were to leave them in their pots for 2-3 weeks as they’d only recently been transplanted. Fair enough. In the meantime, I had plenty of time to decide what I wanted and to plan my shopping expeditions to local nurseries – always the best bit of any new design to my mind.

Finally, in late May, I was able to plant up my new beds, with plants from a variety of local (and not-so-local) nurseries, my mail-order roses from Jones Roses in Cheshire, divisions from my garden (and my parents’ garden), gifts from friends and relocated seedlings and cuttings. I moved the existing golden philadelphus, hydrangea and azalea to the shady side of the garden, where they seem to be thriving. My favourite, oh-so-fragrant Gertrude Jekyll rose was replanted nearer to the apple tree, next to the longer raised bed, where it is doing remarkably well considering how vigorously I hacked it back and root-pruned it to squeeze it into the biggest pot I had before planting once the beds were in situ! Roses are surprisingly tough…

Here’s my plant list, in case anyone is interested:

Main bed:
Rose Koko Loko
Rose Mokarosa
Hibiscus Purple Ruffles (on its last chance – it hasn’t done well elsewhere in the garden!)
Salvias Amistad, Black & Blue, Dyson’s Crimson, Nachtvlinder and Pink Friesland
Echinacea Lustre (grown from seed at the allotment last year)
Hemerocallis Trahlyta (deep purple, spider form – from my parents’ garden)
Aster turbinellum
Aster Mönch
Geraniums Patricia, Rozanne and Ann Folkard (my divisions)
Euphorbia Baby Charm
Euphorbia cornigera Goldener Turm
Phlox divaricata Chattahoochee
Penstemon Amelia Jane (cuttings)
Astrantia major Claret
Eryngium zabelli Jos Eijking
Sedum Purple Emperor (cutting from a fellow allotment plotholder)
Aquilegia (gold foliage, originally from seed and self-sown elsewhere in the garden)
Verbena bonariensis (from a friend whose garden they self-seed in prolifically)
Anthemis cupaniana (cutting)
Phlox subulata McDaniel’s Cushion (had to get this as my maiden name is Daniel!)
Aubrietia
Nepeta

Smaller bed:
Rose Eye of the Tiger
Hemerocallis Siloam Showgirl (from my parents originally)
Miscanthus Adagio
Penstemon Cherry Red
Astrantia major Ruby Wedding
Aubrietia
Phlox Emerald Cushion

My most successful nursery raids were to Coton Manor in Northamptonshire (when visiting a friend at the end of April; if only I’d driven rather than going by train, I’d have bought a lot more! As it was, I gingerly transported them back in a cardboard wine carrier!), Great Dixter Nursery in Northiam, East Sussex and Marchant’s Hardy Plants in Laughton, East Sussex. Garden centres were extremely expensive and provided far fewer pickings in terms of the specific plants I wanted. Staverton Nursery near Ringmer, also in East Sussex, was an honourable exception – they had a range of more unusual specimens at very good prices, despite being a conventional garden centre. As a rule, I’d much rather buy two or three smaller plants of the varieties I want from specialist nurseries as they establish much more quickly and romp away to fill the space, providing a more natural look in the process.

I’ve also included annuals (Cosmos Rubenza and Nicotiana Lime Green) this first summer in case the planting needs bulking up, but actually I’m thrilled with the results just two months in. I also included some of the plump-looking tulip bulbs from last year’s containers (Palmyra, Van Eijk and Silk Road), so am hoping they’ll take up the baton next spring. Even drought-resistant plants need watering in their first year to get established, of course, but so far, so good – and we’ve already got a hosepipe ban here in the South East after a few weeks of hot, dry weather in June.

IMG_0483

My one regret is that Mum and Dad aren’t here to appreciate my revitalised front garden. Not a day goes by that I don’t want to call them and tell them about some particularly pleasing colour combination or new bloom. I know they’ll be looking down and giving it all their seal of approval though – and they’ll be as proud of my new creation as I am. They taught me my craft in the first place, after all.

What I learned at Le Manoir

Birthday girl

Just under a year ago, I was treated to a fabulous ‘Garden to Plate’ cookery course at Raymond Blanc’s country house restaurant,  Le Manoir aux Quat’Saisons, in Oxfordshire as part of my extended 60th birthday celebrations. I’m not quite sure why it’s taken me so long to write up my impressions (life, I suppose), but it’s about time I did. I use at least two of the tips we were taught on a regular basis – and am thrilled how well they work each time.

As a keen gardener cook myself, this course was tailormade for me: not only did we get to tour the fabulous kitchen gardens at Le Manoir (and pass through the famous kitchens), we also picked up top tips from the chefs in the specially designed cookery school kitchen as we prepared a delightful late-summer lunch menu with fresh produce straight from the garden. Bliss. There were just eight of us on the course, the perfect number not to feel intimidated, but not too many that we didn’t feel we could ask questions and learn at close quarters.

Tomato salad

We made (and ate!) heritage tomato salad served on fresh pesto with burrata and olive crumb, assiette de crudités (celeriac remoulade, beetroot and green beans with a mustard vinaigrette, globe artichokes), essence of tomato risotto, summer fruits infused in wine with a sugarwork crisp, and an apricot & almond tart (one to share and one each to take away!). It was a wonderful day with lots of tips; nothing complicated but with the emphasis on capturing the maximum flavour – heavenly! And just the way I like to cook.

I’m not going to go through the whole day in meticulous detail, but I did want to share a couple of the tricks I learned from my day at Le Manoir. Little things that are obvious when you think about them, but hadn’t necessarily occurred to me before.

239270332_4800068046687497_2286593134114485481_n

First things first, the olive crumb that accompanied the tomato salad. I already make and love a chopped homegrown cherry tomato salad (Sungold are my favourite) infused in olive oil, balsamic vinegar, crushed garlic, a pinch of sugar, basil and seasoning, preferably served with goat’s cheese on lightly toasted sourdough bread, but the addition of an olive crumb elevated this simple lunch dish to another level – genius! Simply place some pitted black Kalamata olives in a cool oven (100 deg C) for 2 hours or so until dry. Then chop finely and sprinkle over the tomatoes. Leftover olive crumb can be stored in an airtight container at room temperature for up to a week. They add a real umami flavour to any dish.

Tomato risotto

The tomato essence we used in the risotto was an intensely flavoured extract of tomato juice made using a jelly bag – again, simple enough to do, but who would have thought of it? I make plenty of jellies using fruit, but had never tried tomatoes. Sadly, I don’t think I’ll ever have enough of my own homegrown tomatoes to do this in bulk as the weight of the fruit helps the process, but if you are ever given large quantities of good, flavoursome tomatoes, do try this! It can also be used as the base for an iced soup or even a tomato granita. Somewhat surprisingly, it’s also virtually clear as the colour stays in the skins and pulp – you can use this to make soups or sauces.

Tomato Essence – makes 700-800g essence

2.3 kg tomatoes
1/2 stick celery, finely chopped
1 small shallot, peeled and finely chopped
1/2 medium fennel bulb, chopped
1 clove garlic, peeled and chopped
2 sprigs thyme leaves, chopped
Handful basil leaves, chopped
1 leaf of tarragon (if you have it)
1 tbsp sea salt
1 tbsp sugar (or omit if using very ripe fruit later in the season)
1 pinch cayenne pepper
4 drops Tabasco sauce
4 drops Worcester sauce

You will need to process the resulting mix in batches if using a domestic food processor. Blitz together using the pulse button, then leave to macerate in the bowl for at least three hours to allow the flavours to combine. Then transfer to a strong jelly bag and suspend over a glass bowl for at least 3 hours to collect the essence. Le Manoir make up to 20kg at a time and use bedsheets to hang for 24 hours! Wow… I have a jelly bag stand at home, but if you happen to live in a house with beams, that would be ideal – or a very strong ceiling hook/stepladder/upturned chair.

Another tip that came to light when we were preparing the tomato salad (the simplest of things…) was about preparing the basil for the pesto. You can, of course,  make a perfectly decent pesto using raw basil leaves, blitzed with pine nuts, olive oil, parmesan, garlic and seasoning, but chances are that any left over will oxidise and change colour if left in the fridge, even in a sealed jar, for any amount of time. It doesn’t affect the taste, but doesn’t look quite as appealing. The simple act of blanching the basil in a pan of boiling water for barely a minute, then quickly immersing in cold water and squeezing out the excess liquid before blitzing, preserves that bright green colour, making a pesto that stays green – brilliant!

Kitchen

Last but not least was the pastry for the apricot and almond tart. I’m going to reproduce the entire recipe here as this gave a really professional, pâtisserie-standard tart, but I’ve already adapted the pastry technique in other recipes on my blog where a sweet shortcrust pastry is required, such as my gooseberry tart. It works a treat, every time. This week I experimented with a redcurrant tart, made using the gooseberry tart recipe and this technique, and it came up trumps again.

Redcurrant and creme fraiche tart

The secret lies in turning established cooking methods on their heads – not chilling the dough before rolling, for example, and using clingfilm when rolling out the pastry! I know, I know, I’ve stopped using clingfilm in the kitchen too for environmental reasons, preferring to use those washable ‘shower caps’ you can buy from Lakeland to cover food, or fabric/silicone covers, although I find those slightly less convenient as they aren’t as stretchy. Worth using what clingfilm you have left for this method though. A friend of mine says she’s been using the clingfilm method for years, but it’s not how I was taught, so this was revolutionary news to me. We didn’t even bake blind for this tart, as the almond filling isn’t wet, but if you’re making a custard-based filling, you will still need to bake the case first to avoid the dreaded ‘soggy bottom’….

You can double up the quantities if that’s easier (saves using half an egg!) and freeze one, or the spare should keep in an airtight container for up to a week. Alternatively, you can freeze the unbaked tart case and cook from frozen, but of course that ties up your tart case. At Le Manoir, they use tart rings (no base) on trays lined with greaseproof paper, which might be an option to consider if you’re in the market for buying equipment from scratch.

Apricot  & Almond Tart – serves 6

Apricot frangipane tart

Sweet pastry:
125g plain flour (spelt flour works well too)
2 tsp vanilla sugar
pinch salt
62.5 g butter, at room temperature
1/2 large egg, beaten

Sift flour and salt into a bowl. Stir in sugar, then rub in the butter (you can grate it from cold or even frozen if you prefer) using your fingers. Stir in the egg, then work together lightly to form a smooth dough.

Take two large pieces of clingfilm, place the pastry on the bottom one, then place the other piece of clingfilm on top. Roll out between the clingfilm – no added flour means you can get the pastry really thin and its consistency doesn’t change. Once it’s the size you require, remove the top piece of clingfilm but leave the bottom piece in place. Slide your hand under the pastry and clingfilm and flip over into the greased tart tin – easier than it sounds, just be confident! Gently ease the pastry down into the tin through the clingfilm and only when it’s pressed right down the sides, remove the clingfilm. You can then run a rolling pin over the top to neaten off the edges.

Use any leftover pastry to make mini tartlet cases – you can fill these with the almond mix and fruit the same way or fill with lemon curd/cream and fresh fruit after baking blind – you can lightly prick small cases with a fork rather than filling with paper and baking beans.

Place the pastry case/s into the fridge, covered with foil or clingfilm, and chill for at least an hour.

Almond frangipane filling:
50g butter
50g caster (or vanilla) sugar
50g ground almonds (or you can use 40g almonds + 10g cocoa for a chocolate filling)
1 medium egg, whisked
4 tsp liqueur of your choice (Amaretto or Grand Marnier work well)
(Add 1 tsp sifted flour if using particularly juicy fruit)

250g apricots, plums or cherries, halved and stoned
1 tbsp caster sugar
1 tbsp orange or lemon juice
1 tbsp flaked almonds

Add 1 tbsp sugar and orange or lemon juice to the halved and stoned fruit and allow to macerate for at least 30 minutes while you prepare the filling.

Combine the remaining filling ingredients in a bowl and mix well until blended. Spread the filling gently into the bottom of the unbaked, chilled pastry case. Arrange the fruit attractively on top and sprinkle with any remaining sugar/juice and the flaked almonds.

Bake the tart for 40-45 minutes at 180 deg C (Gas 5) or until both pastry and filling are golden brown. Leave to cool, then devour with glee.

Manoir front

Season for salad

Radishes

With temperatures as high as the mid-30s (40 degrees in parts of the UK!) this past few weeks, it’s hard to consider putting the oven on or even cooking on the hob in this heat. Salads are the answer and fortunately the allotment has been coming up trumps with lots of salad leaves, broad beans, sugarsnap and mangetout peas, and now the courgettes are in full swing too.

Barley straw mulch late July 2022

I tend to go and water the plot after 7.30/8pm when it’s this warm, not least because that forms part of Leo’s evening walk and it’s still too hot on his paws to venture out before. After 8, it’s so peaceful up on the plot and watering/harvesting on balmy evenings is a delight. The builders have started work on the field next to the allotments so peace is shattered if you happen to venture up during the day – I felt as though I’d entered a rave when I popped up to drop something off the other day, with radios blaring, builders singing along at the top of their voices and a fair bit of swearing thrown in. Not what we’re used to in an otherwise tranquil spot on the edge of the village, but that’s progress, I suppose… I’m only usually up there in the evenings or at weekends, so it doesn’t really affect me at the moment, but I do feel for all the retired plotholders who have had their quiet haven invaded. Ho hum.

A month’s worth of going up every evening to water/harvest has allowed me to feel a little more on top of the plot after a slow start this year. It’s amazing what you can achieve if you weed just one bed an evening, or sow a few rows of seed. The peak soft fruit harvest is now over after baskets full of currants, raspberries and of course gooseberries, and the early plums are starting to ripen. A lovely time of year.

I tend to water my pots at home in the morning aand the allotment in the evening to spread the load. Our individual water usage at the allotments isn’t metered, although the allotment association is, so we are not allowed to use hoses, which is absolutely fair enough. At home, of course, I am metered and I had rather a shock last week when my bill came in at over double what it usually is! After some investigation and quite a lot of panic, it transpired that, not only was my meter covered in a thick layer of mud so clearly hadn’t been read properly for quite some time, but South-East Water hadn’t marked the reading as estimated and had clearly plucked a figure from thin air! The true reading was in fact slightly less than it usually is – much to my relief! Do check, even if your reading isn’t shown as estimated. My water butts only ran out a few weeks ago, after the alleged meter reading, and I had a new boiler installed at home in May, which heats the water up much faster than my previous model, so I knew I should be using less…

Barley straw from front

I read recently that barley straw is an excellent mulch for suppressing perennial weeds like couch grass and buttercups: https://www.gcplants.co.uk/barley-straw-weed-control.html. My soft fruit beds got out of control this spring when I didn’t have time to do any weeding, as did the paths between my raised beds. The wood chip I laid in previous years has now rotted down, proving a fertile growing medium for weed seeds and those creeping couch grass rhizomes. Anything organic is worth a try, especially if it doesn’t involve weedkiller (although another plotholder did suggest spraying weeds with undiluted white vinegar!), so a friend with a smallholding kindly ordered a bale of barley straw from a local farmer and I’ve now spread it on all my paths and soft fruit beds. We shall see – keeping my fingers well and truly crossed, and of course I’ll report back either way.

Broad bean, feta and herb salad

Anyway, on to those salads! My broad beans, mainly autumn-sown, have finished now but they were extremely plentiful this year so I’ve tried various salad combinations: my old favourite Broad bean & Halloumi Salad (or you could use feta instead), plus a delicious broad bean hummus or a fishy take with smoked haddock (or smoked salmon if you don’t want to cook). A summer spelt salad inspired by Hugh Fearnley-Whittingstall also hit the spot. French-style salades tièdes where you quickly fry or cook the main ingredients and serve on a bed of lettuce are always very welcome too.

Broad Bean Hummus – serves 3-4

Broad bean and mint hummus

200g podded broad beans (you’ll need 500g of pods for this many beans)
1 garlic clove, crushed
1 tsp tahini paste
Juice of 1 lime
salt and pepper to taste
1-2 tbsp extra-virgin olive oil
Generous handful of mint leaves, chopped

Pod the beans (you can save the pods and use to make vegetable stock if you’re feeling frugal), and place in a glass bowl with a dash of water.  Cover with a lid and microwave for 2-3 minutes. Otherwise steam for 4-5 minutes. Quickly transfer the beans to a colander and immerse in cool water,  then remove the grey outer skins. They should have started to split and come away easily with your fingers. If you’re using very tiny young beans, you can omit this stage, but the bright green colour of the filleted beans is an added bonus.

Put the beans into a food processor with the garlic, tahini paste, lime juice, mint and seasoning,  then blend to a very smooth purée. With the motor still running, gradually pour in the olive oil. Transfer to a pretty bowl and decorate with a sprig of mint or even a mint flower if you have any. Serve with good bread or crudités.

Broad beans with smoked salmon and egg salad

Another salad I discovered years ago but had forgotten about until recently is a Broad Bean, Smoked Haddock and Egg Salad, a hearty-enough meal for even the most salad-averse people! This entails simmering a piece of smoked haddock (preferably the natural coloured fish, not the dyed variety!) in water until it is tender, leaving to cool, then mixing with boiled new potatoes, just-cooked broad beans (filleted if you prefer), hard-boiled eggs, lettuce and/or rocket, sliced radishes and herbs of your choice. I like dill or fennel, but mint would work too. Dress with a  Citrussy Garlic Dressing made from 4 tbsp olive oil, the juice and grated rind of 1 lemon,  1 clove of garlic, crushed, 1 tsp wholegrain mustard and 1 tsp sugar.

Last but not least is a summer spelt salad based on the recipe from the River Cottage Veg Every Day book, but based on what I brought back from the plot as usual. I haven’t given quantities for the veg as it very much depends what you have.

Summer Spelt Salad – serves 2-3

Summer spelt salad

100g pearled spelt (or pearl barley if that’s what you have)
Handful of cherry tomatoes
Sugarsnap peas, chopped
Courgettes, thinly sliced and blanched in boiling water for 3-5 minutes
Baby carrots, chopped
Bunch of carrot leaves, finely chopped
Golden beetroots, roasted in foil or boiled
New potatoes, boiled
Spring onions or baby leeks, chopped (or chives)
Fresh dill (or mint)
Citrussy garlic dressing (as above)
Seasoning

Rinse the pearled spelt in water, then cook in boiling water for 20-30 mins until just tender, but with a slight bite. Drain and add 2 tbsp of the dressing, then leave to cool while you prepare the veg. Mix together and season to taste, adding more dressing as required. The flavours meld together as the salad stands, making this even more delicious if you manage to save some leftovers for lunch the next day.

Broad beans and gooseberries

Garden memories of my mother

Yet another six months have passed since I last wrote here, I’m horrified, but not really surprised, to see. Followers of my other (language) blog will be aware that I’ve been through a challenging time since arriving back from my epic trip to Canada and New England last autumn. Sadly, my mum passed away very suddenly three weeks after I got back from the States and the last few months have been a whirl of funeral arrangements, estate admin, sorting out care for my father and letting out their house. Probably just as well this has all taken place over the winter months so I’ve not had to feel too guilty about neglecting the garden/allotment…

Daffodils Wadhurst 2022

I still miss my mum every day – all those times you think “I must tell Mum about the daphne/magnolia/tulips…”. My great love of gardening undoubtedly comes from my parents and Mum and I were very much on the same wavelength. When we lived up in Scotland and they were in Sussex, she once sent me a parcel containing a brief note which simply said “The daffodils are out!”, much to my amusement. She’s never been allowed to live it down! I like to think she’s still watching down on me and my garden from above and hope she’s not too critical when I inadvertently plant the wrong colours together (yellow and pink – what are you thinking?!). Their gardener keeps texting to me to comment that my mum definitely wouldn’t approve of how the new tenants have cut the lawn/pruned the hedge. When I had them in to tidy up the garden prior to letting, she shook her head when I suggested she put all the leaves in the compost heap if the brown garden waste bin was full (oh, Claire – your mum would be horrified; never put leaves in the compost bin!). I wouldn’t normally either, but needs must…. The only thing we did disagree on was planting distances: Mum liked to see soil around her plants, whereas I’m a great believer in planting things cheek by jowl so there’s no room for weeds!

When clearing their house to let earlier this year, I brought home all the pots of tulips my parents had had last spring, but hadn’t had time to plant out in the garden. I’m thrilled that the early tulips (Mary Ann and Quebec) have made such a fabulous show in my front garden, despite still being in the same pots. My sister took the Sarah Raven tulip collection I’d bought Mum for her birthday in September but she never had chance to plant. I’m hoping they’ll produce a lovely display in the next few weeks too.

Mum's early tulips

The new tenants are apparently keen gardeners, but I did divide a couple of plants that I haven’t already got in my garden as keepsakes. Many of my perennials are divisions of plants in my parents’ garden (and vice versa!) so I had lots of their plants already, but Geranium nodosum Whiteleaf and Hemerocallis Trahlyta (an unusual smoky purple) had unaccountably passed me by. I also brought home some more plants already in pots: hostas aplenty to pass on to friends, rose Diamond Eyes (a lovely dark purple Persian rose, a gift for their Diamond wedding anniversary three years ago) and a pink version of Hydrangea Annabelle that had never done well – probably because my father insisted on planting it far too close to the traditional Annabelle, where it got swamped by the latter’s vigorous growth every year! These are all now safely installed in my garden and I’m sure they’ll provide yet more happy memories of my mum over the years.

Not everything has taken, unfortunately: I lost my beautiful Daphne odora aureomarginata over the course of last year (a gift from my parents originally). It had spread to some 4ft high x 6ft across, tucked in beneath the Katy apple tree in the front garden and every spring it used to fill the garden with scent from February to April. Mum and Dad had two in their garden for some reason, so I decided to lift one, which wasn’t in an ideal place anyway, and transplanted it to replace mine. Sadly, it doesn’t look very happy and, while I’m not giving up on it just yet, I may have to accept that it hasn’t worked. Daphnes are notoriously difficult to move, but, as my mum would say, you don’t know if you don’t try. I still have a huge Daphne bholua Jacqueline Postill in the back garden pumping out the fragrance from December to March, thank goodness.

Daphne aureomarginata Dec 2015

My memories of my mum are inextricably linked with gardens: my childhood garden with its hybrid tea roses like Superstar, Peace and Queen Elizabeth, the damson tree that never flowered until my father accidentally set fire to it, the rose petal ‘perfume’ we used to make assiduously every summer (strange how it never endured more than a day!), the delicious sticks of rhubarb,  eaten sitting on the back doorstep, dipped into a saucer of sugar… Then there was the time my little sister decided to ‘help’ by cutting off all the heads of the red hot pokers (kniphofias) and planting them in a row. I can still remember my father’s expression to this day! (Almost as cross as mine when a neighbour’s daughter decided to pick all my drumstick primulas when we lived in the Peak District….).

Then there were those glorious garden visits on days out: Bodnant and Portmeirion in North Wales, Dunham Massey and Tatton Park closer to home. We visited Alton Towers not for the rollercoasters, but for the splendid pleasure gardens with their Japanese pagodas and majestic rhododendrons. The gardens my parents helped us create over the years: they were always happy to don their gardening boots and gloves and get stuck in whenever there was a new garden to design. And there have been plenty, from our first modest patch in Warrington New Town to a two-acre woodland paradise in the West of Scotland. Mum always had her secateurs at the ready. When my son had his first proper garden at a converted barn near Eynsford in Kent, Mum and Dad were there too, eager to get stuck in, despite both being in their 80s by then.

Mum and dad at the Barn April 2017

They made beautiful gardens of their own too, of course: stately conifers and rockeries when we lived in Cheshire and a delightful streamside garden in Essex for their brief year there. My father maintains his knees are worn-out because of all the patios he’s made over the years! When they moved to Sussex, they transformed an overgrown quarter-acre woodland plot with fabulous full-height rhododendrons into a garden that won a prize in the local Gardens in Bloom competition. They were thrilled and bought a shiny new hose reel with their prize money – but Mum swore she would never do it again as it was far too much hard work (from someone who was out in the garden from dawn ’til dusk anyway!).

Mum and Dad garden competition winners 1988

Once my father retired at the age of 58, they got involved with helping out at an annual plant sale for a local hospice, raising thousands of pounds every year. They loved dividing their plants (hostas, hemerocallis, geums and geraniums in particular) and passing on their years of experience and plant knowledge to prospective purchasers. I couldn’t resist joining the club when I moved down South further down the line, as did my uncle and aunt from Winchester – it became a real family affair! Gardeners love to share, whether it’s plants, seed or tips. It seemed a fitting tribute to Mum to ask for donations in lieu of flowers to the very same hospice, St. Catherine’s in East Grinstead, when Mum passed away.

Mum and dad Wisley Sept 2020

One of Mum’s favourite gardens (and we’re very spoiled for choice down here on the Sussex/Surrey/Kent borders) is the RHS flagship garden at Wisley. I have so many happy memories of visits there over the years, with my boys when they were children, and latterly keeping to the main paths as Dad’s mobility deteriorated. After Mum’s funeral at the end of November, I had to drop my younger son and family off at Heathrow for their flight back to the US and drove past Wisley en route. On my way back, feeling empty and sad after a difficult week, I decided on the spur of the moment to call in at Wisley, just off the M25, for coffee and a stroll as it was such a sunny day. I did think it might feel strange being there on my own, but in fact it was an immensely comforting experience, retracing old paths and remembering happier times. I was accompanied by birds throughout – a robin, then a particularly bright chaffinch and a very chirpy magpie. I didn’t feel alone.

IMG_7368

Mum had a long and mainly very happy life, with gardening a central theme running throughout. She told tales of her childhood wartime garden, where her father grew veg and thought nothing of wringing chicken’s necks for the pot, not unusual in those days. My first rhubarb plant originally came from my Grandad’s garden – apple rhubarb, he called it. She loved her gardening books and quizzes, and her encyclopaedic knowledge of garden plants, Latin names included, is definitely responsible for my own. She even had the advantage of having studied Latin at school, something I was never able to do, much to my chagrin, as they stopped Latin a few years before I reached the requisite age.

Rest in peace, Mum – you’ve taught me much of what I know about gardens and so much more besides. Miss you…

Mum and Leo in the conservatory

Adventures in North America

I know, I know, shocking to realise it’s been six months since I last posted here. It’s been one of those years: busy with work, plus my father has been unwell again, so I’ve spent a lot of time helping out at my parents’ and somehow time has just flown.

A, L, E and C at Quechee wedding venue

Then, joy of joys, I’ve finally managed to fly out to New England to visit my son, daughter-in-law and adorable new granddaughter Emma, not forgetting granddog Callie, another pandemic new arrival. I may have had to come via a circuitous route, spending 14 days in Canada first to get around the fact that most Europeans, vaccinated or otherwise, are still not allowed to enter the US if they’ve been in the Schengen zone, UK or Ireland for the past 14 days. In the event, my cousin and his wife kindly invited me to stay with them in North Vancouver and house-sit for part of the time they were away. They were the most generous hosts, taking me to see some jaw-droppingly beautiful sites up and around the North Shore and beyond, but I also enjoyed exploring British Columbia myself via the excellent public transport system. My unexpected diversion definitely turned into an adventure in its own right. I was absolutely blown away by the stunning scenery and Vancouver is a very special city, surrounded by water and mountains, beautiful gardens, friendly people and a great vibe.

Needless to say, I had to do a PCR test before flying – so stressful even though I knew I was double-vaccinated, had really not been anywhere and had been very careful when mixing with other people. The 24-hour wait before my results felt like one of the longest in my life! I think I was more nervous than before any exam I’ve ever taken! Waiting at Border Control on arrival in Canada was another anxious wait, just in case some part of my vaccination or test certification didn’t pass muster… Then I had to do it all over again before flying to the US, although this time I only needed a rapid antigen test, with results available after 20 (still anxious) minutes. I didn’t need proof of vaccination to get into the US, but I was still worried as the Canadian border officials hadn’t stamped my passport on arrival. In the event, although there was a huge queue for US Border Control in Vancouver Airport, it was primarily down to there being only two staff on duty and a lot of people travelling that day. I’m sure many people will have missed their flights as a result, but thankfully I’d allowed plenty of time and the friendly officer didn’t even ask how long I’d been in Canada! Mission accomplished – what a relief! I don’t think either my son or I stopped smiling or talking for the entire drive home after he picked me up at Boston Airport….


Now I’ve been here a week or so, I’ve finally got to know my beautiful granddaughter and it’s so nice to see their house and garden for real, as opposed to through the Facetime lens. They bought their first home in Beverly, on Boston’s North Shore, last summer, at the height of the pandemic, and have done amazingly well with the garden, sowing salvias, zinnias, echinaceas and many other flowers from seed and planting dahlias as tubers to superb effect, even if the varied colour mix they’d hoped for turned out to be just purple and crimson!

Of course, I couldn’t be here and not get stuck into cooking, gardening and flower arranging as well as cuddling the baby! They’ve had excellent crops of tomatoes (no blight here, unlike at home where my crop has been devastated this year), mounds of courgettes (zucchini!) and a fair number of aubergines (or should I say eggplants?!), both purple and white. Cue for me to make roast tomato soup, baba ghanoush and aubergine parmigiana, plus adapt a vegan zucchini soup recipe I found online to include lemon and thyme to great effect. The courgette soups I’ve tried in the past have often been fairly insipid, but the use of coconut oil in this one and the tang added by the lemon and thyme made it extremely good.

Courgette, Lemon & Thyme Soup
serves 4-6 (depending on portion size!)

92401248-c0e1-4585-bf9c-c658243a2951

1 tbsp olive oil
1 large onion, chopped (or use a generous bunch of spring onions / couple of leeks)
1 clove garlic, finely chopped
Handful of fresh thyme, tied with string (remember to remove when blending)
1-2 bay leaves (fresh or dried)
1 kg courgettes, roughly chopped (you can even use courgettes that have turned into sneaky marrows!)
1 litre vegetable stock (or chicken stock if that’s all you have)
1 can coconut milk
Seasoning
Juice and grated zest of 1 lemon

Grated Parmesan and fresh thyme leaves to serve

Warm the olive oil, then add the chopped onion and garlic and cook gently until softened. Add the chopped courgettes, bay leaves, bunch of thyme and continue to cook gently for 15 minutes or so. Add the stock and coconut milk, plus the juice and zest of half a lemon, and season to taste. Cover and cook for 20-30 minutes, covered. Allow to cool slightly, then remove thyme and bay leaves before blending with a stick blender until smooth. If you prefer, transfer to a liquidiser goblet to blend, but it shouldn’t need sieving either way – unless, like me, you forget to remove the thyme first time round and need to sieve to make sure you remove any string/stems!.

The soup was perfect served with the cheese scones my cousin’s wife made for me in Vancouver – light and fluffy, plus very easy to make. The original recipe came from a guest house they stayed in where the hostess insisted on receiving a recipe in exchange for this one, but it’s well worth the barter – not that any cook worth his/her salt ever minds trading recipes! They can also be made without the cheese and served with jam for afternoon tea or breakfast. My cousin and his son raved about them lightly toasted for breakfast, and I’m sure that a dollop of clotted cream wouldn’t go amiss with jam either….

Sally’s Canadian Scones – makes 8

IMG_7014

2 cups plain/all-purpose flour (330g)
4 tsp baking powder
1 tsp salt
1/2 cup butter (110g – 1 stick!)
1 cup milk or 1/2 milk & orange juice
2 tbsp grated Parmesan (or Cheddar), optional
1 tsp thyme leaves (optional)

Pre-heat oven to 425 F/200 C/Gas 6.
Sift or mix first three ingredients. Rub in butter. Add milk/juice and knead gently. Roll or pat out to desired thickness. Cut into 8 squares. Bake for approx. 12-15 mins. Cool and split before buttering to serve.

If making the cheese version, add cheese to the dry ingredients or brush the tops with milk and sprinkle with cheese before baking.
Enjoy!

6ac0f3bd-e5fb-4945-ad3d-e72da61a4692

One year on…

Facebook reminded me this week that it’s a year since I made my first sourdough loaf at the height of last year’s first lockdown: that’s one whole year that I’ve managed to keep my starter going, which is quite some achievement. I still have it bubbling away (in the fridge most of the time), even though I don’t make quite as many loaves as I did when I had a house full last year. Sourdough buns and sourdough pizza, both with discard (also still in a pot in the fridge and stirred/topped up regularly) are probably my most frequent bakes, although I probably make a loaf at least once a month, then put one half in the freezer for later.

Last weekend, inspired by an old friend’s Instagram post, I experimented with a new sourdough bun recipe, loosely based on a Waitrose recipe for blueberry and pistachio buns, but adapted to my standard sourdough bun recipe and inevitably tweaked to suit my own taste. I felt they needed a lot more cooking than the original recipe suggested, but I took a couple round to a friend that same morning and they absolutely loved them. Blueberries. marzipan and pistachios really are a match made in heaven…

So here’s what I did:

Blueberry, Marzipan & Pistachio Sourdough Buns (makes 9)

115g sourdough starter (discard or fed if you prefer)
360g strong bread flour
2 1/2 tsp dried yeast
1 tbsp sugar
1 heaped tsp salt
1 large egg
75 g softened butter
150g lukewarm water
1 tsp vanilla essence

For the filling:
200g marzipan (homemade if you have it)
200g fresh blueberries
50-75g chopped pistachios (hazelnuts or flaked almonds also work well)

Icing sugar to dust

100g icing sugar, sifted
Juice of 1/2 lemon

Combine all the dough ingredients in a bowl or stand mixer and knead until your dough is soft and smooth. Alternatively, you can use the dough mode on your breadmaker as described above, or a stand mixer if you have one. If not using the breadmaker, you’ll need to leave the dough to prove in a greased bowl in a warm place for about 2 hours.

When the dough has proved, knock down on a floured surface and gently roll/pat out to a rectangle measuring approx. 45 cm x 25 cm (or 18″ x 10″ for those of you, like me, who are old enough to still prefer to visualise measurements in Imperial units!).

Brush the dough with water (or you can use an egg wash if you prefer). Crumble or finely chop the marzipan, then sprinkle over the dough, leaving a bare strip along one edge for ease of sealing. Add the blueberries and chopped nuts. Then roll up from one long edge until you have a long, thin roll. Turn to face you and cut into 9 neat sections. I usually do this by eye, but if you’re aiming for perfection, you can measure each one. If you’ve managed to roll out a 45cm long roll, each section should measure 5 cm wide, but it really doesn’t matter if they’re not spot on!

Grease and line a 20cm square deep cake tin with baking parchment (I like to use a loose-bottomed one for ease of removal). Carefully place the buns in the tin in rows of three.  You may find that blueberries and nuts drop out, but just sprinkle them back over the top. Cover with a cloth (or I use one of those large, re-usable plastic shower caps from Lakeland) and either prove in a warm place for an hour and a half or prove in the fridge overnight for a long, slow rise. Perfect if you’re looking to serve them warm for breakfast – and who wouldn’t?!

The following morning, leave to come to room temperature for 1/2 to 1 hour (counsel of perfection – I’ve cooked them sooner and they’re still delicious!). Heat the oven to 180°C/Gas 5 and cook the buns on the middle shelf for 40-45 mins or until golden brown. The original recipe suggested cooking for 30 minutes at 200°C, but this definitely wouldn’t have been long enough in my oven and the higher temperature would have risked burning the tops before they were cooked – everyone’s oven is different so use your discretion.

Remove from the oven and allow to cool in the tin, then dust with sifted icing sugar. Eat and enjoy! They freeze well too – just reheat to serve.

Tulips (Sanne) and wallflowers

A Hint of Spice

Snowdrops Feb 2021

What a grey month February can be. After last week’s cold snap and crisp snow, the return to grey skies, constant rain and muddy walks has hit us hard. The snowdrops are out, admittedly, but many other bulbs are still hidden under their carpet of mulch, not daring to show their faces until they are guaranteed some sun. No camellias out in my garden either, although I have seen some early specimens on my brief drives to the shops. The seeds ordered last month have come, but I don’t sow anything until late March, even in a propagator as they’ll be ready to pot on far sooner than I’ll have indoor space for. And so we soldier on in this greyest of grey times, no family parties to cheer us up, or even the prospect of summer holidays to look forward to – not with any certainty at any rate.

It’s down to food to bring a hint of warming spice into our lives at the moment. I don’t always feel like a full-blown curry, but a gently spiced dish can be just what the doctor ordered to tempt a jaded palate or introduce new vigour into winter food. Even the allotment’s spoils are thin on the ground after the snow: the cavolo nero is all but finished and the purple sprouting broccoli not yet showing its delicate flower shoots, although I have been eyeing up its large and lustrous leaves as a possible substitute for kale. I still have leeks, and the spinach and chard should produce more leaves as the weather warms up, along with the parsley in a final rush before it runs to seed in spring. Fortunately, I still have bags of cooking apples in the cool of the garage and homegrown chillis in the freezer: adding these whole to a bag in the freezer as they ripen has been a revelation. They freeze beautifully and can be taken out of the freezer and chopped straightaway for peak freshness – must be all that capsaicin!

One of my favourite lightly spiced dishes is a lamb keema biryani, made with minced meat (keema). I’ve been making this for years and it’s always been a family favourite. It even freezes well too, contrary to expectations, so the fact that it always seems to make more than you think is actually a boon. I forget where the original recipe came from, but I’ve adapted it over the years and it’s absolutely delicious. It even uses a spoonful of bought curry paste for ease, something I rarely use, but if you buy a good one (I like Patak’s), it shouldn’t weigh on your cook’s conscience. You could equally well make your own paste, of course.

Lamb Keema Biryani – serves 4-6

Lamb biryani

350g basmati rice, well rinsed
750ml hot vegetable stock
2 tsp turmeric
2 tbsp oil
2 onions, chopped
2 cloves garlic, finely chopped
1 red pepper, chopped
1-2 red chillis, finely chopped
2 tbsp medium curry paste (I like Patak’s Rogan Josh or Tikka Masala)
750g minced lamb
1 can of chopped tomatoes
1 generous tbsp tomato purée
125g frozen peas
2 tsp garam masala
25g butter
seasoning

To garnish:
2 hard-boiled eggs, sliced into wedges)
fresh coriander, chopped
Handful of cherry tomatoes, halved

Place the rice, stock and turmeric in a large pan and bring to the boil. Simmer uncovered for 10 minutes.

Meanwhile, fry the onion and garlic in the oil in a large ovenproof casserole dish, then add the finely chopped chilli, red pepper and lamb. Cook until the lamb has browned, then mix in the curry paste, canned tomatoes, tomato purée and seasoning. Cook, stirring regularly, for about 15 minutes. Stir in frozen peas and garam masala. While the keema is cooking, preheat the oven to 200°C/gas 6.

At this point, the original recipe suggests layering the rice and mince mixture in a separate ovenproof dish, but I tend to just stir in the rice into the lamb and cook in the same dish. It tastes just the same and saves on washing up! Dot with butter and cover with a lid or foil. Place in the hot oven and cook for 25-30 minutes.

Serve steaming hot garnished with hard-boiled eggs, halved cherry tomatoes and fresh coriander. Perfect for warming the cockles of your heart on a miserable February day.

Another lightly spiced recipe I came across recently was recommended by a colleague when we were discussing lentils in my favourite foodie group online. The link she passed on was from The Guardian and contained two recipes from Anna Jones, a cook I hadn’t encountered before, but have added to my must-read list after this delicious recipe for a cauliflower & lentil pie. I’m reproducing it here for ease of reference, but I haven’t changed much from the original, other than reducing the quantity of cauliflower to one rather than two – and there was still plenty for three hungry people (or one for me and two in the freezer in my case!). I didn’t use curry leaves either as I hadn’t got any and am not even sure where I’d get them from in a pandemic in deepest rural Sussex. A couple of bay leaves worked nicely instead, although perhaps without the curry kick of the original. (Note to self: Waitrose stocks them, so may add them to my next online order for future experimentation!)

Cauliflower & Puy Lentil Pie – serves 3-4

Cauliflower and Puy lentil pie

Olive oil
1 tbsp mustard seeds
A couple of fresh bay leaves (or curry leaves if you can get them)
2 carrots, peeled and finely chopped
1 onion, peeled and finely chopped
2 sticks celery, sliced (or use bulb fennel if you have it)
1 tbsp cumin seeds
1 tbsp of coriander seeds,
2 garlic cloves, peeled and finely sliced
1 thumb-sized piece of ginger, grated (I keep mine in the freezer so it’s easier to grate)
1 x 400g tin of Puy or green lentils, drained and rinsed
1 x 400g can of tomatoes
1 tsp vegetable stock powder
1 tbsp tomato purée
4 dates, chopped
1 red chilli, deseeded and chopped
1 lemon, grated zest and juice
Salt and pepper
1 large cauliflower, leaves removed
1 tbsp coconut oil

Add the mustard seeds to a decent glug of olive oil in a large ovenproof casserole dish, then cook for a couple of minutes until the mustard seeds pop. Take the pan off the heat, reserve half the seeds, then put the pan with the remaining seeds back on the heat.

Add the onions, carrots and celery (or fennel) to the pan and cook for another 10-15 minutes, or until soft and starting to turn golden brown. Crush the cumin and coriander seeds in a pestle and mortar, then add to the pan with the garlic and ginger. Cook for a further 3-4 minutes to release the flavour of the spices.

Add the drained lentils, bay leaves, tomatoes, tomato purée, stock powder and rinse out the tomato tin with hot water from the kettle before adding that too. Roughly chop the dates and add to the pan with the chopped chilli and the zest of half the lemon. Season with salt and pepper and simmer on a medium heat for 25 minutes, or until thick, rich and flavourful. Add the lemon juice at this stage.

Meanwhile, make the cauliflower mash. Break the cauliflower into florets and place in the top of a steamer. Pour boiling water into the bottom and steam until the cauliflower is tender – about 10 – 15 minutes. Drain well, then allow to cool before blitzing in a food processor with the coconut oil and seasoning. When the mash is silky smooth, fold in the reserved mustard seeds and the remaining lemon zest.

 You can either leave the lentil mixture in your casserole or transfer to an ovenproof pie dish and top with the mash, depending on the size of your dish. Swirl the mash into pointy peaks with a knife, then bake for 20-30 minutes, or until the tips of the mash are golden and the lentil mixture is piping hot and bubbling.

Portion cauliflower and lentil pie

My final lightly spiced recipe is almost a blend of the other two, mixing rice and cauliflower in a Middle Eastern-inspired cauliflower pilaf. This was on the BBC Good Food recipe calendar in January of this year and tantalised me every day I walked past until I ultimately succumbed and made it. Definitely as good as it looked. Like the lentil & cauliflower pie, this is a vegan dish, but no less delicious for all that – and an excellent one to have in your repertoire when we’re allowed to entertain again. I’m not keen on raw onion, so didn’t pickle the onion as suggested in the original recipe, but roasted it with the cauliflower instead.

Harissa Cauliflower Pilaf – serves 2-3

Cauliflower pilaf

150g basmati rice
1 red onion, cut into wedges
1 lemon, zest and juice
1 tsp sugar
2 tbsp harissa paste
1 garlic clove , crushed
1 tbsp olive oil
1 medium cauliflower , broken into florets
pinch of turmeric (or saffron, if you have it)
1 bay leaf
350ml hot vegetable stock
50g sultanas
50g flaked almonds , toasted
fresh coriander
Half a 400g can chickpeas , drained and rinsed
50g pomegranate seeds (optional – I used fresh cranberries, but cherry tomatoes would work too)

Rinse the rice well, then leave to soak in cold water for 1 hr.

Heat the oven to 180°C fan/gas 6. Whisk 1 tbsp harissa, garlic and oil in a large bowl, then add the cauliflower and toss to coat in the sauce. Season, then tip into a roasting tin and roast for 30 mins until tender and golden, turning halfway through.

Meanwhile, mix the turmeric or saffron, bay leaf, sugar, stock and 1 tbsp harissa in a small pan over a low heat to keep warm while the cauliflower and onion roast.

Remove the cauliflower from the oven, tip into a dish and add the lemon juice and zest. Drain the rice and tip into the roasting tin. Pour over the infused stock, and mix well. Stir in the sultanas, half the almonds, half the coriander, chickpeas, and half the cauliflower. Cover the tin with a double layer of foil, sealing well, then bake for 30 mins until the rice is tender and the stock has been absorbed.

Fluff up the rice with a fork, then fold in the remaining cauliflower (this creates a contrast of cauliflower textures). Scatter over the remaining coriander and toasted almonds, and garnish with pomegranate seeds or whatever you’re using to add colour and extra zing.

Iris Katharine Hodgkin

Blood oranges are not the only fruit… but boy, are they good

Blood orange juice_cropped

I may have mentioned before that blood oranges are one of my favourite seasonal treats. They remind me of family skiing holidays in the Italian Alps, where they always seemed available earlier than in the UK. In colours ranging from deepest ruby to a delicate blush-red tinge, they are tarter than their standard orange relatives, yet deliciously tangy, sweet and juicy at the same time. I love them for my wake-up breakfast juice and eaten segment by segment, just as they are – grab a tissue as they are definitely more likely to drip down your arm than a normal orange!

In recent years, shops seem to have shied away from the old term “blood orange”, opting instead for blush oranges or ruby orange when used in juice, or even Sanguinello, from their Sicilian name. Why anyone could possibly be offended by the connection with blood, I’m really not sure. Perhaps for the same reason that you never hear talk of oxblood red shoes these days, although they were always my favourites as a little girl growing up in the 1960s… Blood oranges are rich in anthocyanins, which accounts for their dark colouration and superfood status – as if we needed any further excuse to eat them during their oh-so-short season.

Blood orange, apple and fennel salad

Baking/cooking with blood oranges is as rewarding as you might think. Blood orange sorbet is divine, and a cake made with blood oranges, polenta and ground almonds just perfect. I recently threw together a colourful winter salad with blood orange, red cabbage, fennel, rocket, apple and parsley, all set off by a sharply citrussy vinaigrette. Last weekend I even experimented with a delectable recipe for blood orange & coconut panna cotta. They also add another dimension to tray-baked chicken dishes. Heaven on a plate…

My first recipe is one of Jamie Oliver’s, a deliciously succulent orange & polenta cake, perfect for gluten-intolerant visitors (in normal times, of course), as it contains no flour. I’ve tweaked the glaze as blood oranges are often smaller than standard oranges. It was the perfect consistency even though I used less liquid than he recommends.

Blood Orange & Polenta Cake – serves 12

Blood orange and polenta cake

200g butter
200g demerara sugar
3 large eggs
1 tsp vanilla essence
200g ground almonds
100g polenta
zest of 2 blood oranges (keep the juice for the syrup)
1 tsp orange blossom water
1 tsp baking powder (gluten-free if necessary)

SYRUP

5 cardamom pods, peeled and crushed
zest of 2 blood oranges
200 ml blood orange juice (I used the juice of 5 blood oranges)
2 tsp orange blossom water
125 g vanilla sugar

Toasted coconut flakes (or flaked almonds) to garnish

Preheat the oven to 150°C (fan)/gas mark 3, then grease and base line a 24cm springform cake tin.

Beat the butter and sugar in a large bowl until light and creamy. It will look gritty as demerara sugar is very coarse, but it will dissolve when baked! Gradually beat in the eggs, then stir in the vanilla essence, orange zest and orange blossom water. Fold in the ground almonds, polenta and baking powder.

Pour the mixture into the tin and bake for 45 to 50 minutes, or until the surface is golden brown, just firm to the touch, and the cake is coming away slightly from the sides of the tin. Remove the tin from the oven and leave to cool for 10 minutes or so.

Meanwhile, make the syrup: put the crushed cardamom pods, orange zest, juice, vanilla sugar and orange blossom water into a small pan. Simmer over a medium-low heat for about 10 minutes, or until reduced and thickened to a syrupy consistency. Set aside to cool slightly.

Prick the cake all over with a skewer while still in the tin. Place on a plate to catch any juice, then drizzle the syrup evenly all over. Remove from the tin and serve just warm with crème fraiche, whipped cream, or just as it is with a cup of tea and a contented sigh. Keeps well in a cool place for up to a week and is equally good cold.

Blood orange and polenta cake slice

I’m very partial to panna cotta and when this Sarah Raven recipe came up in my e-mail inbox last week, I just had to try it. I ended up tweaking it quite a bit, as I felt there was far too much gelatine in the original, but I was very happy with the end result. The tray-baked chicken recipe I mentioned is in the same article, should you want to try that too. I also used the lighter coconut milk as that’s what came in my online shopping order (sigh), instead of the full-fat milk I’d ordered. I adjusted the fat content by adding some cream to the yogurt in the original, but you can play around as you like, using all yogurt, or a mix of the two.

Blood Orange & Coconut Panna Cotta – serves 6

Blood orange and coconut panna cotta

Caramel:

140g granulated sugar

Panna cotta:

4 gelatine leaves
400ml tin coconut milk (ideally full fat, not the light version)
2 tbsp vanilla sugar
1 tsp vanilla paste
1 tsp orange blossom water
zest of two blood oranges
150ml natural yogurt
200ml double cream

To serve:

4 blood oranges, peeled, halved and thinly sliced
1 tsp orange blossom water

Start by making the caramel: lightly grease six ramekin dishes and place on a tray or baking sheet. Put the sugar and 5 tbsp water into a small pan over a low heat. Stir slowly until the sugar has dissolved, then allow the syrup to boil without stirring. Take off the heat when the syrup starts to turn brown, taking care not to burn it. Pour into the prepared ramekins and set aside.

Now make the panna cotta: soak the gelatine sheets in a bowl of cold water. While they are soaking, scrape/pour the coconut milk into a pan over a low heat, adding the sugar, vanilla paste, orange blossom water and orange zest. Stir until the sugar has dissolved and the mixture is gently simmering. Squeeze the water out of the gelatine, add to the pan and stir until dissolved. Take off the heat and allow to cool slightly, then stir in the cream and yogurt.

Pass the mixture through a sieve into a jug to make sure it is silky smooth, then pour carefully into the ramekins. When cool, transfer to the fridge to set overnight.

To serve, loosen the sides of each panna cotta with a small knife. Pour boiling water into a small shallow bowl and sit each ramekin into the hot water for a few seconds to help loosen the caramel. Put a small serving dish on top of each one, turn upside down and turn out. Serve with the blood orange slices.

Finally for today, my sorbet recipe is loosely based (sugar content halved!) on the original recipe book that came with my first ice cream maker, a Magimix with a freeze-ahead bowl. It served me well for 25 years or so until I finally succumbed a few years ago and treated myself to a fully automatic Cuisinart ice cream maker. No more finding space for the bowl in my well-stocked upright freezer, especially given that frost-free freezers may look just as large, but have a smaller internal capacity due to the frost-free workings and extra insulation. You can still make the sorbet in a container by taking out every hour or so and mixing in the ice crystals as the juice sets, of course.

Blood Orange Sorbet

Blood orange sorbet_Feb 2021

125 g granulated sugar
450 ml water
Zest of two blood oranges
300 ml freshly squeezed blood orange juice (I needed 7 oranges)
Juice of one lime (or lemon)
1 egg white, whisked to soft peaks

Place the sugar, water and orange zest into a pan over a gentle heat and stir until the sugar dissolves. Then turn up the heat and boil for 10-12 minutes, or until it reduces and you have a syrupy mixture. Allow to cool.

When cool, stir in the orange and lime juice, and chill the mixture for a couple of hours in the fridge. Then pour into your ice cream maker and set the timer for 30-40 mins. Check every so often to check whether it is starting to set. Add the whisked egg white at this point and continue churning for another 10 minutes. You may need to mix in any residual egg white by hand when turning into a freezer container. Alternatively, freeze in a container, breaking up the ice crystals every hour or so until it starts to firm up, and fold in the egg white with the final mixing.

Enjoy!

Leo and the snowmen_Feb 2021

Thoughts from a gardener/cook…